I hope that in the past couple of months you have found your way over to check out my new home at Big Rigs 'n Lil' Cookies. Same great stuff, just my new home and permanent web location. Please stop by, and be sure to sign up for email updates so you catch all the latest and greatest!!
November 2, 2014
September 18, 2014
Rustic Italian Chicken and a Giveaway!
The awesome folks over at Red Gold Tomatoes
sent some tomato products for me to try, and I have to honestly say I
love them all. I am really fussy about tomatoes and have been pleased
with everything I have tried. Even better, Truckin' Man has liked
everything too!
We tried out the Rustic Italian Chicken recipe. I had to make one change to the recipe. We can not buy boneless skinless chicken thighs in our little local stores. So, I bought regular chicken thighs, and removed the skins myself. I do NOT debone chicken, so I cooked the thighs with the bone in, and it turned out beautifully! Delicious recipe, and amazing moist flavorful chicken. Try it, I bet you will love it too!

Right now, Red Gold is working to help us all out in the kitchen and make things easy with Slow Cookers! They have some delicious recipes for us to try, AND... they are giving away 44 custom Red Gold branded slow cookers beginning September 17 on their Facebook page! 2 winners will be chosen every day through October 8th, so you need to sign up for this ASAP!

To
enter this giveaway, leave a comment with your email
address the recipe you most liked. If you prefer, you can email me for
your recipe choice at bigrigsnlilcookies@gmail.com Open to U.S.
residents only.
Deadline: Wednesday, October 8th 11:59 pm CST
Winner: I will randomly choose a winner and announce it at the top of this post. The winner will also be notified via email; if the winner does not respond within 24 hours, another winner will be selected.
Rustic Italian Chicken
12 chicken thighs, skinless
2 large carrots, cut into large chunks
1 red bell pepper, chopped
1 cup baby bella mushrooms, sliced
4 garlic cloves, minced
2 Tbsp Italian Seasoning
Salt and Pepper
1 - 14.5 ounce can Red Gold Diced Tomatoes
2 - 15 ounce can Crushed Tomatoes
3 cups pasta
Parmesan Cheese, grated (optional)
Spray Slow cooker with cooking spray. Place chicken in slow cooker, and top with remaining ingredients, except pasta. Cover and cook on low for 6 to 8 hours.
Serve over your favorite pasta. Garnish with parmesan cheese, if desired.
Enjoy :)
We tried out the Rustic Italian Chicken recipe. I had to make one change to the recipe. We can not buy boneless skinless chicken thighs in our little local stores. So, I bought regular chicken thighs, and removed the skins myself. I do NOT debone chicken, so I cooked the thighs with the bone in, and it turned out beautifully! Delicious recipe, and amazing moist flavorful chicken. Try it, I bet you will love it too!
Right now, Red Gold is working to help us all out in the kitchen and make things easy with Slow Cookers! They have some delicious recipes for us to try, AND... they are giving away 44 custom Red Gold branded slow cookers beginning September 17 on their Facebook page! 2 winners will be chosen every day through October 8th, so you need to sign up for this ASAP!
Another great thing that Red Gold is
doing is providing an apron for one of you!! To enter for a chance to
win this apron, tell me what Red Gold Crock Pot recipe you would most
like to try!
Click here to see the recipes.
Deadline: Wednesday, October 8th 11:59 pm CST
Winner: I will randomly choose a winner and announce it at the top of this post. The winner will also be notified via email; if the winner does not respond within 24 hours, another winner will be selected.
Disclaimer: Red Gold provided me with tomatoes and an apron for participating in the
"2-a-Day Crock-Pot Giveaway", but all opinions are my own.
Rustic Italian Chicken
12 chicken thighs, skinless
2 large carrots, cut into large chunks
1 red bell pepper, chopped
1 cup baby bella mushrooms, sliced
4 garlic cloves, minced
2 Tbsp Italian Seasoning
Salt and Pepper
1 - 14.5 ounce can Red Gold Diced Tomatoes
2 - 15 ounce can Crushed Tomatoes
3 cups pasta
Parmesan Cheese, grated (optional)
Spray Slow cooker with cooking spray. Place chicken in slow cooker, and top with remaining ingredients, except pasta. Cover and cook on low for 6 to 8 hours.
Serve over your favorite pasta. Garnish with parmesan cheese, if desired.
Enjoy :)
September 13, 2014
White Chicken Chili with Hatch Chile
Come on over and check out my latest recipe featuring Hatch Chile.

http://www.bigrigsnlilcookies.com/2014/09/white-chicken-chili-with-hatch-chilies.html
August 18, 2014
Jamaican Jerk Chicken
Have you been over to the new Big Rigs 'n Lil' Cookies to see all that is going on?
You can sign up in all the same ways you signed up before.
There is email, bloglovin and Google Friend Connect!
Come on over and check out my Jamaican Jerk Chicken!!

July 31, 2014
Exciting News!
Sorry for being gone so long again, but this time it isn't that I have been away from blogging, I have actually been working on kicking off my new blog. I would love for you all to come on over and take a look. You can sign up for email updates on the new site as well so that you don't miss any new recipes, or any garden or chicken updates!
I haven't published any new posts there yet, so you haven't missed anything, just moving everything over so we don't lose anything! The new blog is Big Rigs 'n Lil Cookies!! I do want to thank everyone who helped brain storm the new name with me, you are all wonderful friends and I thank you so much!
For any of you that are interested in crafting, Waldorf Schools, etc., my sister has started a blog also and you can find her at Bee and Ewe. Stop by and say hi, she is just getting things started over there :)
Here is the new link again for a quick reference!!!
Facebook: https://www.facebook.com/pages/Big-Rigs-n-Lil-Cookies/605680736208039?ref=hl
July 20, 2014
Pecan Chewies and a Give Away!
Don't you love it when you find a recipe that you absolutely love? It can be the most simple recipe, with ingredients you have in your fridge and pantry, but it just knocks your socks off!
That is exactly what happened when I made Pecan Chewies from my newest cookbook "South Your Mouth", authored by one of my best blog buddies, Mandy Rivers, who blogs over at South Your Mouth! These bars knocked my socks off! My parents dropped by shortly after the bars had cooled, and pretty much knocked their socks off too! Being Mandy is from South Carolina, I thought it was appropriate to use my special stash of South Carolina pecans that my friend Missy has me supplied with! I honestly would not change one thing about this recipe, they were perfectly buttery, nutty, delicious!
The other super cool thing going on? I get to giveaway one of these cookbooks to one lucky reader! I am so excited to share this cookbook with you. I LOVE Mandy's recipes. Her name is so common in our house, you would think she was a neighbor. Truckin' Man will ask what's for dinner... my answer "Potato Goulash". He will raise an eyebrow at that and I tell him not to worry, "It's one of Mandy's recipe's". Once he knows it's her recipes, he asks no further questions!
Mandy is a mom on the move, so she has lots of family friendly recipes. I have yet to find her use an ingredient that I can't easily find, and livin' where I live, shopping can sometimes be a challenge!

To enter this giveaway, leave a comment with your email address. If you prefer, you can email me for your chance to win at sugarcookiestopeterbilts@yahoo.com
Deadline: Saturday, July 26 11:59 pm CST
Winner: I will randomly choose a winner and announce it at the top of this post. The winner will also be notified via email; if the winner does not respond within 72 hours, another winner will be selected.
Pecan Chewies (Source: South Your Mouth)
1 cup Butter, melted
1 cup Sugar
1 cup Brown Sugar
2 eggs
2 teaspoon vanilla
2 cups all-purpose flour
1 tablespoon baking powder
1 teaspoon salt
1 1/2 cups chopped pecans
Preheat oven to 300 degrees. Grease a 9x13 pan. Set aside.
In large bowl, cream together melted butter (cooled back to room temp), sugar, brown sugar, eggs, and vanilla with mixer until smooth and creamy.
In another bowl, sift together flour, baking powder, and salt. Slowly add dry ingredients to butter mixture. Mixing until completely combined. Stir in pecans, mixing until they are evenly distributed through batter.
Spread batter evenly into prepared pan, and bake for 40-45 minutes, or until set in the middle. Once cooled, cut into bars and store in airtight container.
Enjoy!!
Sharing this recipe at:
Treasure Box Tuesday
Weekend Potluck
July 15, 2014
Flowers on the Farm
The yard work and flowers around the farm have been a work in progress. This year is more about maintaining than anything else. With all the projects going on, we thought it was smarter to keep it that way! However, I couldn't resist the urge to buy a new color of an iris when I found one in the local garden center, for 60% off!
Here is a little bit of what is in bloom right now!
So many hosta's!

My favorite hosta.

I love my lilies!


We have so many hollyhock. We never planted a single one, but in our weeding and cleaning up, we uncovered them from years ago! A lady that lived hear more than twenty years ago, remembers that the lady before her had hollyhocks! How cool is that?


This is the newest mystery plant we have uncovered. We tore down a shed that was attached to the back of the house, and have since found about five of these growing. We both agreed that they did not look like a weed, so because of our curiosity we let them live! It looks like one is ready to bloom and I am so excited to see what it is! It is very much resembling a flower I know as "Moon Plant".
What do you think it is?

July 12, 2014
Spicy Tomato Burger
I was beyond excited when Red Gold Tomatoes contacted me about their Summer Grillin' Party. The party began June 25th on their facebook page. During the party, which ends on July 23rd, they are holding a weekly drawing for 1,000 aprons..... AND a grand prize of a Big Green Egg Grill and Red Gold Grilling kit. How cool is that?
To add to the fun, they sent me tomatoes, recipes and an apron! I have had so much fun with these tomatoes. I made a delicious baked main dish I will share with you another day. For today, we are talking about a burger on the grill! A burger with tomatoes in
it! I was leery of this. Truckin' Man and I are not big on tomatoes on
our burgers, but you know what? We loved them IN the burger. So,
parents... if you want a way to get your kids to eat another veggie...
try this!

Disclaimer: Red Gold provided me with tomatoes and an apron for participating in the
"Summer Grilling Party", but all opinions are my own.
Spicy Tomato Burger (Source: Red Gold)
1 pound lean ground beef
1 - 14.5 ounce can Red Gold Petite Deiced Tomatoes with Green Chiles (Drained)
Salt and Pepper
Cheese (I used cheddar, but recommend topping with a Pepper Jack cheese)
Burger Toppings
Buns
Preheat grill.
Drain tomatoes well. Combine ground beef and diced tomatoes. Form into patties. Season well with salt and pepper.
Place patties on grill and cook until medium well. Top with cheese and close grill for another minute, until cheese is melted.
Remove and assemble burgers with your favorite toppings!
July 10, 2014
Raspberry Cream Cheese Dessert
I LOVE raspberries, it is my most favorite berry...
Except for maybe black raspberries pulling a close second. Since my moving to the farm, we have really got a nice red raspberry patch growing that absolutely thrills me.
The red raspberries have been producing for a while now, but mainly just enough to snack on. Last weekend when we finished one of our big projects, we walked over to the patch and hung out there for about half an hour relaxing and munching on some berries. A couple days later... boom... Berries are in abundance and needing to be picked! I was ready to bake something amazing with them. I scoured through some of my cookbooks, then moved onto pinterest, and ended up doing some good old fashioned google searching and finally found what I was looking for!

You see, Truckin' Man LOVES cheese cake. Loves and adores it, his all time favorite dessert. He is always asking for me to make it for him. And, I did make it for his birthday, but really... we are two people who love to eat, so we do not need to have a dessert in the house like cheesecake to often. So, this recipe I thought was perfect! Cream Cheese, but not four packages of it. And, it was a huge success. It has enough cream cheese for the flavor to come through, but it is light! I don't feel nearly so guilty after indulging in a slice of this dessert! And, Truckin' Man was lovin' every bite of it, so I think we have finally found a cream cheese dessert to keep both of us happy!

2 cups graham crackers, crushed
2 Tbsp sugar
1/4 cup butter, melted
12 ounces cream cheese, softened
1 tsp vanilla
1/2 cup sugar
2 tsp lemon juice
1 cup heavy whipping cream
1 cup raspberries
Additional raspberries for garnish, optional
Preheat oven to 375 degrees. Spray bottom of springform pan with cooking spray, then line with parchment paper. Set aside. Mix graham cracker crumbs, sugar, and melted butter. Stir until completely combined. Press into bottom of springform pan. Bake for 8-10 minutes, until lightly browned around edges.
In large mixing bowl, beat softened cream cheese until light and fluffy. Add vanilla, sugar, and lemon juice, mixing well. Set aside.
In another bowl, beat whipping cream until soft peaks form. Gently fold whipped cream into cream cheese mixture. In small bowl, add raspberries and mash. Gently fold berries into the cream cheese mixture. Gently pour filling into parchment pan, smoothing top when done. Refrigerate minimum of 4 hours.
Enjoy!
Sharing this at:
Treasure Box Tuesday
Foodie Friends Friday
Weekend Potluck
July 6, 2014
Around the Farm
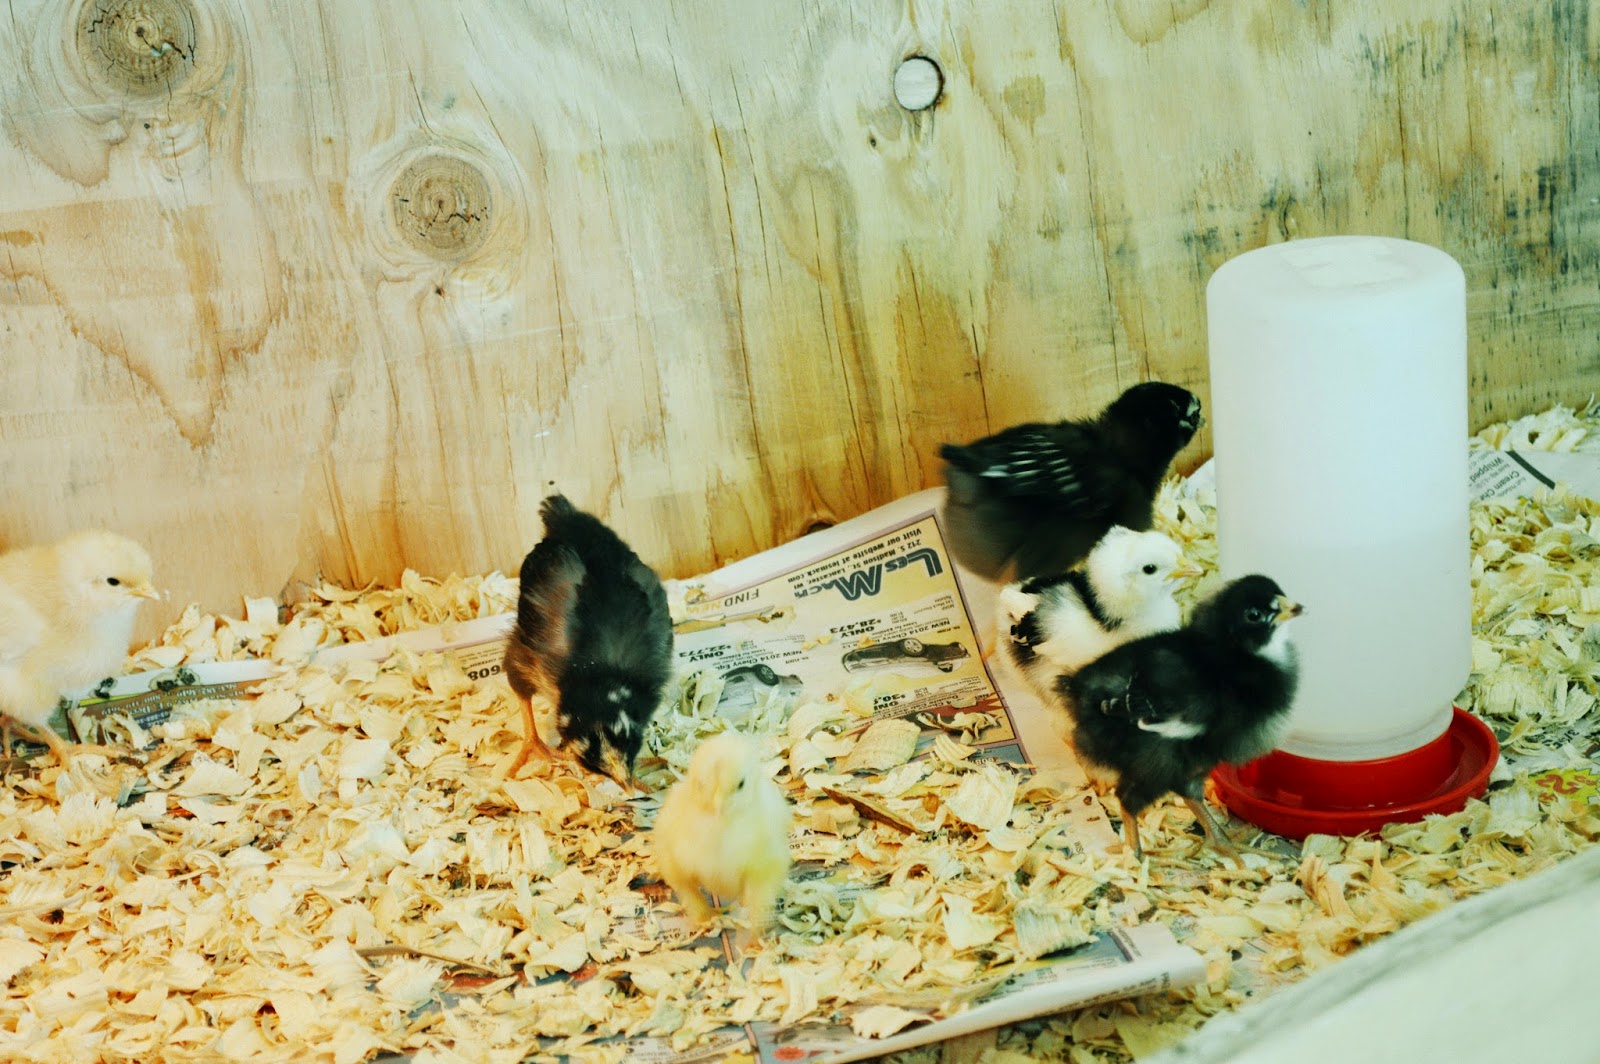
Our warm months seem to be passing by so quickly! Between the day job, taking care of normal life duties, now the garden, and the baby chicks, I have been seriously lacking in my blogging!! Please know that life is good! We are just busy busy, and enjoying some time outside!
Our chicken coop is still a work in progress, but the chicks are loving it! They are growing so fast, they keep pushing us to the next step faster than we thought we would have to be there! Like the day I knew they needed to feel that green grass under their feet! Truckin' Man roughed in a door opening for them, so that they can get some sunshine, bugs, and fresh green grass!

Some just liked to look without actually taking that step outside!

So much fun watching them. This picture is already a couple weeks old, and they have lost most of their fuzz, and have feathers growing in.

Very few have names so far, but this lady does. This is Georgette!

This is one of the two Buff Cochin Bantams we have.


We did have three Silver Laced Wyandottes. Two of them were for my parents, and they took them home to their coop yesterday.

The chicks quickly out grew the little chicken run, and the low fence. So today, we had to put in the permanent fencing. That began with needing a gate. I found an old tailgate to a wagon that was made out of 2 x 4's. I thought that was a perfect start! After looking at it, Truckin' Man agreed and cut up a couple old barn boards to fill in the gaps. Isn't it perfect?! I just LOVE it!

Do you have any baby chicks this year? I'd love to hear about them!
July 3, 2014
Independence Day Jello Sugar Cookies
Today is the July edition of Fill the Cookie Jar! This month our theme is a Patriotic Cookie. I just have to give a big thanks to Cynthia for organizing this group and keeping us challenged. I really like the push to try a new cookie and break out of my routine!

For the Patriotic Cookie, I decided on these Independence Day Jello Sugar Cookies. They are so fun and a great cookie! Definitely a bit of a sugar rush with each cookie, so be sure if you make these to share with your friends! I frosted with a cream cheese frosting to cut the sugar level down a bit. Really? Are you believing that? I will try any excuse to have Cream Cheese Frosting in the house!

Having such a fruit flavor in a cookie is a bit strange for me, and not something I would make regularly. But, definitely fun and tasty, for a treat! These would be fun with orange for Halloween, or lime for St. Patricks Day. Of course, cherry and lime for Christmas. Even fun for a tailgating party with your teams colors!

If you are interested in joining Fill The Cookie Jar group on facebook, fill out the form that can be found at Fill The Cookie Jar. Each month we bake a different theme for the cookie.
We bake, we share and we enjoy our cookies!
We bake, we share and we enjoy our cookies!

Independence Day Jello Sugar Cookies (Source: Somewhat Simple)
1 cup sugar
2/3 cup butter, softened
2 eggs
1 tsp vanilla
3 cups all-purpose flour
1 tsp salt
1 tsp baking soda
3 oz Cherry Jello, divided
3 oz Berry Blue Jello mix, divided
2 Tablespoon Sugar
Red food coloring
Blue food coloring
Preheat oven to 400 degrees. In a large bowl, cream butter and sugar. Add the eggs and vanilla, mixing until completely combined. In a medium bowl combine flour, baking soda, and salt. Add dry ingredients to butter mixture, mixing until flour is completely combined.
Divide dough in half. Add 3 tablespoons of Cherry Jello to one half of dough, and 1/4 to 1/2 teaspoon of red food coloring. Mix until color is completely combined and no streaks remain. Next, add 3 Tablespoon of Berry Blue Jello, and about 1/4 teaspoon of blue food coloring to the other half of dough. Mix until color is completely combined.
Set aside two small bowls, and add one tablespoon red jello mixed with one tablespoon sugar to a small bowl. And do the same with the blue jello, adding to another bowl with one tablespoon sugar. Roll one tablespoon of cookie dough into ball, then roll in the coordinating jello sugar mixture. Place on baking sheet several inches apart. Flatten each cookie slightly with the bottom of a glass.
Bake for 9 to 10 minutes. Cool on baking sheet for 5 minutes, then transfer to cooling rack.
Once cool, frost and decorate as desired.
Enjoy!
Sharing this at:
Foodie Friends Friday
Weekend Potluck
Treasure Box Tuesday
June 12, 2014
Mushroom & Swiss Cheeseburger Macaroni
One of the great things about the blogging world is all the fantastic people that you meet. Some you really connect with and love their style of living, cooking, gardening, and start following their blogs. Bobbi's Kozy Kitchen is one of those blogs. Bobbi is an amazing cook, and she will inspire you to eat better and cook with real ingredients!
When Bobbi shared her Mushroom & Swiss Cheeseburger Macaroni, I was so excited. I always loved hamburger helper type meals. The boxed helpers of
whatever kind, where I would add the fresh meat, veg or dairy, and end
up with a good meal. Then, I started learning about really "cooking", and
what was in those boxes. It didn't take long for me to quit buying them
completely. In my own weird way I have always missed them. But, Bobbi had a recipe for that kind of meal I was missing, yet it had "Real" ingredients! AND, it had Swiss Cheese! I LOVE Swiss Cheese!
This is a fantastic recipe, and a now a "go to" recipe for us. The only change I made from Bobbi's recipe was that I added pea's, because I love them so much. Don't like pea's? Skip 'em!
Just pass up the boxed stuff and try this recipe! You won't be sorry!!

Mushroom & Swiss Cheeseburger Macaroni (Adapted from: Bobbi's Kozy Kitchen)
2 Tbsp olive oil
1/2 onion, sliced
8 ounces button mushrooms, sliced
2 cloves garlic, minced
1 lb. ground beef
8 ounces elbow macaroni
3 cups beef broth
3 Tbsp Worcestershire sauce
2 Tbsp Dijon mustard
1/2 tsp. Salt
1/8 tsp. Pepper
1 cup peas, frozen.
3 Tbsp butter
3 Tbsp flour
1 cup milk
2 cups Swiss cheese, shredded
Over medium heat, heat olive oil in large skillet. Add onion, and saute until turn golden. Add sliced mushrooms and cook for five minutes. Once mushrooms have sauteed, add the garlic, and cook for one minute. Push mushrooms mixture to side of skillet, and add ground beef. Break beef into pieces as it cooks with spoon. Stir the mushrooms in with beef. When beef is cooked through, add macaroni, beef broth, Worcestershire sauce, mustard, salt and pepper. Cover and bring to a boil. Reduce heat to a simmer, and cook for about 10 minutes, stirring occasionally. Just before macaroni has reached al dente, add pea's. Stir to combine.
While macaroni is cooking, heat milk in microwave for one minute, just until warmed. Set aside.
In medium saucepan, melt butter over medium heat. Add flour, stirring continuously. Continue cooking for 3-4 minutes, continuing to stir. Add warmed milk, continuing stirring until mixture is thickened. Remove from heat, and add half cup of cheese. Stir until cheese is melted. Repeat, adding cheese half cup at a time until all cheese is melted into sauce. Add cheese sauce to macaroni mixture. Add more salt or pepper, to taste.
Enjoy :)
Sharing this at:
Weekend Potluck
Treasure Box Tuesday
June 10, 2014
Gardening!
I am so very excited for our garden this year. We had to move it to a new location, so we are starting over in a corner of what was a corn field last year.
There was a lot of prep that went into preparing the new garden.

We are in a nice little triangle, that got really weedy... really fast!

All of the squash plants seem to be doing well!

We picked up some brussel sprouts at the local green house. They seem happy too :)

I adore pea's, so they had to be in the garden!

Somehow my onion rows didn't stay to straight! I must have been getting tired on planting day!

When I was going out to take the garden pics, I found this guy scurrying around in the tree above me. I know they do bad things around the farm, but he's kinda cute!!

So, how is your garden growing?
June 6, 2014
Around the farm
We have been so busy since the snow melted, it's amazing how full a day can be. Truckin' Man has been trying to divide his time between trucking, farming, and the "honey do" list. Poor guy... So much work, so little time. We hired an amazingly ambitious 15 year old young man to help out around the farm, and it is soooo nice having his help. We are making a little headway.
First project up for this year was a new chicken coop.
Truckin' Man didn't want to buy a pre-built one, all though he says next
time he will!

My dad even stopped to supervise for a little while.

Instead of picking out chicks at the local farm supply store, this year we ordered them from a hatchery. They arrived in the mail on May 20th. Best mail I have ever received!
Here we are at about three weeks old.

We have 14 little ones. A variety of breeds.

I am so excited to see everyone of them grow!

June 5, 2014
Date Cookies
For this month's "Fill the Cookie Jar", the theme is Dad's Favorites. I really didn't know this one either, because for my mom and dad both, I would have said that their favorite cookie was "homemade"! So, I had to check with my dad. I decided to attempt number three on his list, since it was not on the blog already, and I was a little intrigued by it. Dad had great memories of a Date Cookie that his grandma used to make. That's what you call an old family recipe, and I had no idea how to find. My grandma, has a lot of her recipes in the local church cookbooks, so I scoured through those, no luck. I sent my cousin a message, she seems to be able to locate most of Grandma's recipes when requested.
I went with the second of the recipes that my cousin sent, I thought it sounded more like the cookie my dad described. I really didn't know what I would think of a "Date Cookie". Surprisingly, it is pretty tasty. Truckin' Man even liked them, and grabbed several off the cooling rack.
It is more of a "cake" cookie than my normal cookie, and definitely more of a time consuming (putzy) cookie to make, but in the end, I think they were worth the time. I think this is a great cookie to go along with a cup of coffee. Hope you enjoy, and I hope my dad enjoys when he gets to sit down with his cookies!

If you are interested in joining Fill The Cookie Jar group on facebook, fill out the form that can be found at Fill The Cookie Jar. Each month we bake a different theme for the cookie.
We bake, we share and we enjoy our cookies!
We bake, we share and we enjoy our cookies!

Date Cookies
Filling:
1 1/2 cup chopped dates
1/2 cup sugar
1/2 cup water
1/4 cup chopped pecans
1/4 t. lemon extract (or 1 T. lemon juice)
Add dates, sugar, water and pecans to medium saucepan. Cook over medium heat until thickened. Cool. Add lemon juice. Set aside.
Batter:
2 cup brown sugar
1/2 cup butter, softened
1/2 cup shortening (Crisco)
3 eggs, beaten
1 t. vanilla
1 t. baking soda
1 T. hot water
3 1/2 cup flour
1 t. salt
Preheat oven to 350 degrees. Line baking sheets with parchment paper, set aside.
In large bowl, cream together brown sugar, butter and shortening until smooth and creamy. Add eggs and vanilla. In measuring cup, mix together soda and water, then add to sugar mixture. Add flour and salt, mix well.
Drop dough by teaspoonful on prepared baking sheets. Make slight indentation in center. Put 1/2 tsp. date filling in center. Spread about 1/2 tsp. dough over filling (enough to cover the filling). Bake for 13-16 minutes or until light golden brown. Cool on baking sheet for 5 minutes, then transfer to cooling rack.
Enjoy :)
Sharing this at:
Clever Chicks Blog Hop
Treasure Box Tuesday
Foodie Friends Friday
June 3, 2014
Magic Custard Cake
What did we ever do before Pinterest? I know I had a bazillion bookmarks and half of them I never made it back to. Now, I can keep everything neat and tidy. In the right category so I can easily pull them up if I remember just part of the name even. A huge bonus when I don't have a great memory for recipe names.
I had seen a recipe traveling around on Pinterest and Facebook for a "Magic" cake, and it was just the cake I needed for something different to serve. It was simple, but impressive. I was called Martha Stewart for serving this, and that was meant as a compliment!
It is a VERY thin batter, so don't panic like I did, it's ok! It does make some magic in the oven, and that thin thin batter transforms. I am going to try the chocolate variation of this next. I am really excited for that twist.
Please note.... this is not lemon, and mine are extra "yellow" because of the farm fresh eggs.

Magic Custard Cake (Source: Hugs & Cookies and Jo Cooks)
4 eggs, at room temperature
1 tsp vanilla extract
3/4 cup sugar
1/2 cup butter, melted
3/4 cup of all purpose flour
2 cups milk, room temperature
powdered sugar
Preheat oven to 325 F degrees. Grease a 8 inch x 8 inch baking pan, then line with parchment paper.
Separate the eggs. Add egg whites to bowl and mix at medium high speed until egg whites are stiff. Set aside.
In another bowl, beat the egg yolks with the sugar until light in color. Add the melted butter and vanilla. Beat for two minutes. Add flour and mix until fully incorporated.
Slowly add the milk to the egg yolk mixture, beat until well combined. Add the egg whites, folding them in, a third at a time. Once egg whites are incorporated, repeat with another third until all egg whites are completely incorporated.
Pour batter into baking pan and bake for 50 to 70 minutes or until top is lightly golden. Insert knife near edge, if it comes out clean the cake is done.
Cool completely and dust with powdered sugar.
Enjoy :)
Sharing this at:
Foodie Friends Friday
Weekend Potluck
Clever Chicks Blog Hop
Treasure Box Tuesday
I had seen a recipe traveling around on Pinterest and Facebook for a "Magic" cake, and it was just the cake I needed for something different to serve. It was simple, but impressive. I was called Martha Stewart for serving this, and that was meant as a compliment!
It is a VERY thin batter, so don't panic like I did, it's ok! It does make some magic in the oven, and that thin thin batter transforms. I am going to try the chocolate variation of this next. I am really excited for that twist.
Please note.... this is not lemon, and mine are extra "yellow" because of the farm fresh eggs.
Magic Custard Cake (Source: Hugs & Cookies and Jo Cooks)
4 eggs, at room temperature
1 tsp vanilla extract
3/4 cup sugar
1/2 cup butter, melted
3/4 cup of all purpose flour
2 cups milk, room temperature
powdered sugar
Preheat oven to 325 F degrees. Grease a 8 inch x 8 inch baking pan, then line with parchment paper.
Separate the eggs. Add egg whites to bowl and mix at medium high speed until egg whites are stiff. Set aside.
In another bowl, beat the egg yolks with the sugar until light in color. Add the melted butter and vanilla. Beat for two minutes. Add flour and mix until fully incorporated.
Slowly add the milk to the egg yolk mixture, beat until well combined. Add the egg whites, folding them in, a third at a time. Once egg whites are incorporated, repeat with another third until all egg whites are completely incorporated.
Pour batter into baking pan and bake for 50 to 70 minutes or until top is lightly golden. Insert knife near edge, if it comes out clean the cake is done.
Cool completely and dust with powdered sugar.
Enjoy :)
Sharing this at:
Foodie Friends Friday
Weekend Potluck
Clever Chicks Blog Hop
Treasure Box Tuesday
May 31, 2014
Crunchy Pea Salad with Bacon
Hey ya'll. I am still here, and I am still cooking! It's just been so stinkin' busy, I am having a hard time having much computer time! I promise I will be better and share some pictures of what's been going on, but here is a little update. We have relocated our garden, and it is huge! And thankfully, most everything is in and planted! I am so excited to see everything grow! And.... we got more baby chicks! 16 of them! 2 of them, I am raising for my parents until they get a little bigger. I am super excited to see these little ones grow too!
With all this busy-ness going on, things have been a little less exciting in the kitchen. Lots of throwing a burger on the grill with a veggie on the side. But, things are starting to calm a bit, and we had a friend over for dinner the other night, so I got back on my game and did some fun stuff in the kitchen.
This pea salad is so yummy. I LOVE pea's.... as long as they aren't out of a can! And, it has bacon!!! The original recipe called for a pound of bacon, but I tried to keep it a little lighter than that since this was a side dish to a pork chop. You can substitute or add in any other favorite salad items you might have. I think some small cubes of colby or cheddar cheese in here would be a great addition.

Crunchy Pea Salad with Bacon (Slightly adapted from: Sugar 'n Spice Gals)
10 oz frozen peas, thawed and drained
1 cup roasted and salted peanuts
1/3 cup chopped green onions
5 slices bacon
1 cup craisins
1/2 cup mayonnaise
1 Tbsp, plus 1 tsp of vinegar
1 tsp sugar
1/4 tsp soy sauce
1/4 tsp Worcestershire sauce
Salt
Cut bacon into pieces, about 1/2 inch. In skillet, cook the bacon until crisp. Remove bacon from skillet with slotted spoon. Set aside on paper towel to cool.
In small bowl, combine mayonnaise, vinegar, sugar, soy sauce and Worcestershire sauce. Mix until all ingredients are incorporated.
In large bowl, add peas, peanuts, green onions, bacon and craisins. Add mayonnaise mixture and stir until all ingredients are coated with dressing. Taste, and add salt as needed.
Chill for at least one hour.
***Note, if you have leftovers, you may need to add a little more mayo to the salad.
Enjoy :)
Sharing this at:
Treasure Box Tuesday
Foodie Friends Friday
Weekend Potluck
With all this busy-ness going on, things have been a little less exciting in the kitchen. Lots of throwing a burger on the grill with a veggie on the side. But, things are starting to calm a bit, and we had a friend over for dinner the other night, so I got back on my game and did some fun stuff in the kitchen.
This pea salad is so yummy. I LOVE pea's.... as long as they aren't out of a can! And, it has bacon!!! The original recipe called for a pound of bacon, but I tried to keep it a little lighter than that since this was a side dish to a pork chop. You can substitute or add in any other favorite salad items you might have. I think some small cubes of colby or cheddar cheese in here would be a great addition.
Crunchy Pea Salad with Bacon (Slightly adapted from: Sugar 'n Spice Gals)
10 oz frozen peas, thawed and drained
1 cup roasted and salted peanuts
1/3 cup chopped green onions
5 slices bacon
1 cup craisins
1/2 cup mayonnaise
1 Tbsp, plus 1 tsp of vinegar
1 tsp sugar
1/4 tsp soy sauce
1/4 tsp Worcestershire sauce
Salt
Cut bacon into pieces, about 1/2 inch. In skillet, cook the bacon until crisp. Remove bacon from skillet with slotted spoon. Set aside on paper towel to cool.
In small bowl, combine mayonnaise, vinegar, sugar, soy sauce and Worcestershire sauce. Mix until all ingredients are incorporated.
In large bowl, add peas, peanuts, green onions, bacon and craisins. Add mayonnaise mixture and stir until all ingredients are coated with dressing. Taste, and add salt as needed.
Chill for at least one hour.
***Note, if you have leftovers, you may need to add a little more mayo to the salad.
Enjoy :)
Sharing this at:
Treasure Box Tuesday
Foodie Friends Friday
Weekend Potluck
May 26, 2014
Great Smoky Mountains
Life has been so busy, I am just now getting the chance to share the last leg of our journey with you.
The beauty in the Smoky Mountains never ceases to amaze me. This was the first time I have traveled through during the spring, so it was nice getting a different perspective.
From Asheville, North Carolina to Gatlinburg, TN we traveled on the Blue Ridge Parkway. If you have the time, this is definitely the best way to travel this area. I have been on the parkway before, and Truckin' Man had not. He was so happy we took the little bit of extra time to go the scenic way.

There are pull-offs every where for you to stop and enjoy the views.

So many creeks with the clearest water imaginable.

Noah "Bud" Ogle Farm was one of many places we explored.

The Floyd Garret Muscle Car Museum was Truckin' Mans must see destination.
He loved ever minute of this amazing museum.

Just outside of Pigeon Forge, we drove through a covered bridge. My first time seeing, let alone driving through one!

I will be back later this week with more of what has been going on around the farm keeping us so crazy busy!
Hopefully, some recipes will be rolling out this week too!
Hopefully, some recipes will be rolling out this week too!
Subscribe to:
Posts (Atom)